How we converted a 1987 Chevy Van G20 into a Camper for $500.
Fall 2018 – Cheaha Mountain, AL
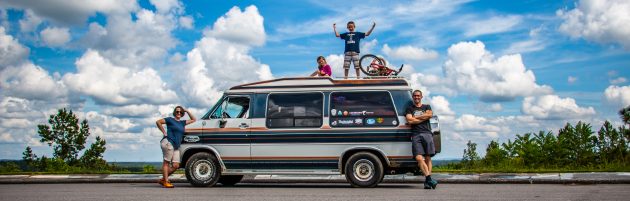
Happy Times
I still remember telling my daughter to be still and not move. She’s not used to being on top of Rocinante. Since she’s our wild one, I was a little nervous to take my eyes off of her. My son, Rabian, climbed up on his own in his flip flops. That’s all he will wear in the summer. He was laughing when he held his muscles up for the countdown. We probably tried for 5 minutes to get this one. This picture has come to stand for how we all feel about last summer. It was a happy year for us.
Deciding to make a camper van
We purchased this 1987 Chevy Van in early August. I had just gotten a new job and we had planned for it to be a work vehicle for me. Within days the idea of making a camper started to gnaw at us. A week or so later, I walked outside in the morning, opened my shop and just started taking stuff apart. I didn’t know which way I would go but I wanted to make it our own. I wanted to make something we could take to a campsite and make some memories in.
This post contains affiliate links and shortcuts to helpful products we needed when we were traveling in our van. If you make a purchase from those links you will be supporting this content and this site will receive a proceed from that purchase. Thank you.
How we did the simple conversion
Here’s a look at how we did it in pictures. This entire process only took a couple of weeks. The materials for the rebuild were about $500 total. The 2x2s we used are cheap. I put it all together with screws. The panelling that went on the walls is thin for weights sake but has held up perfectly. Even with these rowdy kiddos. The flooring was probably the most expensive part. Hopefully if you are about to do your own conversion, you’ll benefit from seeing what’s underneath the walls and floor before you get started. Good luck with your build!
Pamela washing the van the day after we brought her home..Here’s a before shot looking into the rear of the van.
You can see it’s pretty roomy to begin with but it would have been hard to find a place for everyone to sleep comfortably. I could stop here and we could all just sleep on the floor. It’s pretty spacious with the seats out of the back. You could easily do some hammocks right here and have all that space free.
Deciding if I should go deeper….A yard full of van contents.Now I realize I’m fully committed. At this point, I know I’ll have to do some rebuilding before it’s over. With the carpet out of the back, we decided to lay some laminate flooring. It’s risky since I’m not sure how the humidity will affect the expansion of the wood. ( 8 months later, no problems. )
I had to take a metal bar out of the floor and fill the gap with some 2x2s that I ripped to fit. Also you can see I covered the holes for the two captains chairs. I redrilled the holes from the bottom of the van and had to buy new bolts that were longer to get it all back together. I’m framing up some storage with untreated 2x2s. This stuff is light and with screws is quite sturdy when complete. We filled those compartments later on with jumper cables, the jack, hammocks, and other things that we don’t need that often. Excited that it’s all coming together.
Here’s version 1.0 complete. Very thin paneling on the walls and slightly thicker pressed wood for the bed. The sideways bed is for Pamela, I’d sleep in the floor since I’m 6’1″, and the kids wherever they’ll fit. At this point Pamela relaxed and realized that I hadn’t just destroyed the van. After version 1.0 we tested it out sleeping on the back 40. We slept on air mattresses. It worked but it wasn’t there yet. The mattresses were so bulky and not as comfortable as we liked. My Mom stopped by one day and we added a bunk bed for Allyona. Our 4 year old little girl. It fit her perfectly and gave us all more space. We ordered mattresses from Amazon. Smaller for the kids and thicker foam for the adults. This turned out to be the ultimate setup. All four of us could now sleep comfortably through the night.
Perfect for getting into smaller sites. We hit the road right away. Here’s Pine Glen campground in Heflin, AL. $3 bucks a night with a big clear-water creek for us all to cool off in. We’ve camped here dozens of times as kids. Here’s another from Pine Glen. Nice fire babe…. I think it needs more O2. Here’s a last minute trip to Coleman Lake Campground in Alabama. We really had the hang of our system by this time.
A few nights at the Upper Campground in Cheaha State Park, Alabama. Just posing with Rocinante. ( Named in honor of Don Quixote’s reliable but not so majestic steed.)Living large with this 80s interior. You can see the mattresses better here. We carry all of our other supplies in two of those black tough boxes. One had the camp supplies like stove and dishes. The other had mostly food. I used those exact same black boxes in the early 2000s when I deployed to Iraq and Afghanistan. They are tough and still going.
We met this guy at Unicoi State Park near Helen, GA. He eventually made off with some of our hotdog buns after breaking into one of the black tough boxes. I first thought he was a big possum in the camp. Unicoi State Park in Georgia. This is close to the German themed town of Helen, GA. Little Tallapoosa Park, Carrollton, GA
Summer time camping can be hot, especially if you have just arrived to your site after a drive and are trying to sleep. The pipes under the van are warm and continue to generate heat for a couple of hours. I suggest leaving time for the vehicle to cool down before it’s sleeping time. We also added some battery powered fans to move the air around and help us stay cool.
Our 2019 plan is a bit more audacious. We have recently switched to a new camper and are planning to hit the road later this year full-time. Read about that plan here. or follow along with us by subscribing to the blog.
I’d love to see a picture of your rebuild. Drop a link in the comments and let me know what you’re working on. Cheers.
The middle seats were the captains chairs.Each of them had four bolts holding them to the floor. I had to climb under the van and hold a wrench on the nuts while someone else ratcheted from the other side. They were pretty long bolts. After I installed the floor, I had to buy slightly longer bolts to make it all fit.
Did yall have any engine problems? Or when we run it its got a bad gas odor. Oh and the steering wheel was upside down. Someone tried to fix it now it’s side ways.
Mine came with a queen sized bed. Did yours? I’d love to talk with you more.


I’m starting my own teardown of a van. my question is how did you after removing the middle seats get the base of the seat out? I’m at that stage now.
how did you remove the bases to the two middle seats?
The middle seats were the captains chairs.Each of them had four bolts holding them to the floor. I had to climb under the van and hold a wrench on the nuts while someone else ratcheted from the other side. They were pretty long bolts. After I installed the floor, I had to buy slightly longer bolts to make it all fit.
Hey thanks for this post.
I just bought a 1991 Chevrolet G20 Van.
Did yall have any engine problems? Or when we run it its got a bad gas odor. Oh and the steering wheel was upside down. Someone tried to fix it now it’s side ways.
Mine came with a queen sized bed. Did yours? I’d love to talk with you more.